Living Low Carb – One Minute Muffin

In my search for low carb breads to satisfy that need for bready goodness, I came across this One Minute Muffin recipe on  Healthy Living How To.
The author, Vanessa Romero states that this she didn’t invent the recipe and that there are many variations that can be found on message boards in the low carb community.  I have seen several like this, but this one is my favorite.

I also add a teaspoon of nutritional yeast, which basically adds zero carbs to the recipe and I like the flavor and addition of B vitamins.  Using the nutritional ingredients on the products I had at home, I came up with a net carb of 2.4g.  This is excellent for keeping in my carb target.  I used a 4 inch ramekin and it makes a hamburger sized bun like the one pictured above.  It was almost too much bread after not eating any bread for the past month and a half.  It is great toasted to eat with my fried eggs and bacon. Yum!

Click the links or photo to get the recipe and check Vanessa’s site for more healthy living ideas.

Dragon Thursday – Homemade pepper sauce

The garden this year has been amazing.  I have had a great time finding ways to use everything.  Since I I love all things dragon, when I saw a pepper named Dragon Cayenne, I had to buy it.  The plant is a heavy producer and the peppers are lovely.

I decided I would attempt making a Tabasco style sauce using the dragon cayenne and a few of the jalapeños from the garden.

I looked at several recipes online and decided to use this one from Rants From My Crazy Kitchen

It calls for 1/4 pound of cayenne peppers, then jalapeños and hot cherry peppers (which I do not have) so I improvised.  I ended up using a little over 1/2 pound of cayenne and jalapeño peppers.  I then doubled the rest of the ingredients in the recipe and followed it as written.

Dragon Cayenne

I began by washing and removing the stems from my peppers.  I then added them to a medium size sauce pan with lid.  I used about a  1/2 pound+ dragon cayenne and jalapeño peppers, six large cloves peeled garlic – chopped, 2 teaspoons salt, four cups white vinegar.  Bring to a boil, then lower heat,  cover and simmer for 20 minutes.  

It was suggested that this be done outside.  The vapors can be very strong and irritating to the eyes and nose.  I did not cook this batch outside, but I did use exhaust fans.  I have cooked peppers before and had the fumes be extremely overwhelming.  You may also want to wear gloves when handling the hot peppers.

After boiling, I  carefully poured the hot mixture into a blender and pureed.

Then I poured it into a food mill which I had placed over the sauce pan that I had used to cook the mixture in.

I strained out the seeds and other solids and returned the pan of liquid to the stove. 

 I brought the liquid back to a boil.  Once it began to boil, I turned the fire off and set aside to cool.  

I had saved some bottles with shaker tops for making hot sauces and vinegars.  Use whatever method you prefer to clean and sterilize your jars.  I used a funnel to add the cooled sauce to my bottles.  Here is the finished product.  The recipe states it should last six months in the refrigerator.  (Keep refrigerated)

Thanks again to Bernadette at Rants From My Crazy Kitchen for posting this recipe.  I didn’t follow it exactly but it was a great place to start. 🙂

Living Low Carb – Satisfying my sweet tooth with Chocolate Brownie Mug cakes

Eating low carb does not mean giving up foods that satisfy my sweet cravings.   I know eating low carb should help curb those carb cravings but I love a bit of something sweet occasionally.   One of my go to desserts is this recipe for Chocolate Brownie Mug cake that I found on Pinterest.  The recipe is from a website titled ibreatheimhungry.com        I love the name!

I have found many wonderful recipes on Pinterest pinned from this website and the Chocolate Brownie Mug Cake below is one of my absolute favorites.  The standard recipe makes two mug cakes.  I tend to double the recipe so I can have emergency sweet tooth treats on hand and it allows me to share with my family.   These cakes are meant to be eaten warm.  It does make a big difference in taste to me if they have been refrigerated, they seem a little dry.   I heat the ones I have leftover a bit in the microwave before eating.  Yum!  I do not add the chopped chocolate to mine but I do use the pecans and add whipped topping which is surprisingly low carb – 1 carb per 2 tbsp.

The recipe indicates using a granulated sugar substitute.  I have tried several different low carb  sweeteners.  I have used Swerve ( I use the granular for the brownies), a stevia extract, and Monk fruit.  I like the monk fruit blend the best and I have adjusted the amount used to less than the recipe calls for because it was a bit too sweet.  I have found that with sweet low carb recipes it is a matter of personal taste and what type of sugar substitute I use that determines the amount of sweetener.

Let’s get started:  Almond flour, coconut flour, sugar substitute, salt, unsweetened cocoa powder and baking powder and chopped pecans in one bowl.  Eggs, melted butter, and vanilla in another. So quick and easy. (This picture is my doubled recipe)

IMG_6350


Brownie Batter

Doubled recipe batter divided between four dishes. Ready to pop into the microwave.

Chocolate Brownie Mug Cake after cooking in microwave for 1minute and 15 seconds. I cook two bowls at at time.

Now to enjoy:

Chocolate brownie mug cake heaven.

Sometimes I like drizzling  Stevia chocolate syrup on the whipped topping to make it seem like a  really decadent chocolate treat.  I found it on Amazon. Click image for more information.


Warm and comforting, this is the quickest way to low carb brownie bliss there is!  (I whole heatily agree)
Serves: 2 servings
Ingredients
  • 2 Tbsp butter
  • 3 Tbsp almond flour
  • 1 tsp coconut flour
  • 1½ Tbsp granulated sugar substitute
  • ¼ tsp vanilla
  • pinch of salt
  • 1 egg
  • 1 Tbsp unsweetened cocoa powder
  • ½ tsp baking powder
  • 1 square Lindt 90% chocolate, chopped
  • 2 Tbsp pecans, chopped (optional)
 
Instructions
  1. Melt the butter in a small microwave safe bowl (about 30 seconds in microwave). Add the remaining ingredients and stir until combined. Pour batter into 2 small greased mugs or ramekins. Microwave for 1 minute. (add another 30 seconds if necessary). Serve with whipped cream or sugar free vanilla ice cream.
 
Notes
Approximate nutrition info per mug: 230 calories, 23g fat, 3g net carbs, 6g protein


Let me know what you think.
Enjoy!
Melyna
Albert Phineas Drache

Living low carb – Guilt free low carb chips.

Since adopting a low carb lifestyle, I have missed having chips and salsa and chips and guacamole. I made some from baking low carb tortillas but they were not really satisfying and I got very few chips for the carbs.    Pork rinds do not fill this gap, so I went looking for an alternative.

I found a recipe for Paleo Dipping Chips on Pinterest from a site called beautyandthefoodie.com

The article states that the chips are more like crackers.  These are not the thin, light restaurant tortilla chips I used to eat but they are very tasty.   I have made them twice.  The first time I rolled them out to the thickness of a thin cracker.  The second time I rolled them out even thinner and they baked fine and were not overly delicate.  To achieve a hardy chip for dipping, I would leave them a little bit thicker.  That said, they  satisfied my craving for chips, salsa and guacamole.  The nutrition information states that the recipe makes four serving with a net 2.5 carbs per serving.  I split the entire batch with my husband and felt pretty good at having only 5.0 net carbs for the chips.  It makes a lot of chips.

I gathered my ingredients and got busy! (forgot the olive oil in the pic)

Chip ingredients

Everything is mixed in one bowl (which is nice)  It doesn’t look like it makes much, but remember it is rolled out pretty thin.

IMG_7573

Place the dough on a sheet of parchment the size you will be baking it on.  Place another sheet on top and roll out to desired thickness.

IMG_7574

Carefully remove top sheet of parchment from the dough.  Mine stuck in some places.  I found that if I lightly wet my fingers with water, I could ease the dough off the parchment and put it back in place.

IMG_7577

Next, score the dough into the shapes your want with a pizza cutter or knife.

IMG_7579

Place on baking sheet and either spritz with an olive oil mister or use a pastry brush and lightly oil the top of the dough (this is what I used).  The recipe states to make a mix of the spices and salt again then sprinkle on top before baking.  Bake in a preheated oven (350 F) for 10 minutes.  Check to see if it is browning.  If not continue to bake and check frequently until it is a golden brown.  (Some of the thinner edges were a little crispier but tasted fine)

IMG_7582

Let them cool for a few minutes and break apart.  Eat with your favorite dip. Yummm!

First batch of chips that I left a little thicker than the second batch.

First batch of chips that I left a little thicker.

Close up of first batch of chips

Close up of first batch of chips


Second batch of chips with Guacamole.

Second batch with guacamole

closeup of chips.

IMG_7589

Please let me know if you try this recipe and your thoughts on it. 🙂

Melyna

Albert Phineas Drache


Living Low Carb – Coffee and cheese danish for breakfast? You bet!

On my quest for low carb recipes, I am always drawn to the sweets.  I admit that I have a sweet tooth.  I have found that if I can satisfy it with something low carb it helps me from cheating.  I found a recipe for Low Carb  Cheese Danish on Pinterest.  It is on a website called Up Late Anyway (love the name!) This recipe is similar to the Fathead Pizza dough that I blogged about on Friday.  It uses mozzarella cheese in the dough but this one is definitely sweet.  I had the ingredients on hand although not exactly like the author of the recipe suggests. (I soon found out that this is very important)

You can find the recipe and instructions here:  Cheese Danish

So, I gathered my ingredients:

OLYMPUS DIGITAL CAMERA

Ingredients for low carb danish


Next is measuring and mixing the dough.  I whisked together the almond flour, coconut flour and baking powder in a bowl until well mixed.  Then in a separate bowl, I melted the butter then added the vanilla and sweetener to it and mixed well. (I used  4 tablespoons Monk fruit blend by Health Garden) I placed the shredded mozzarella in another bowl and melted it in the microwave per instruction.

low carb danish


I then beat the egg and mixed all of the ingredients together and mixed with a spatula.  My dough was too wet and a bit stringy, so I added about one half tablespoon almond flour to the parchment I was rolling it on and on top of dough.  I placed another sheet of parchment on top of the dough and rolled it out.

low carb danish dough before rolling

OLYMPUS DIGITAL CAMERA

low carb danish rolled out

It was a bit thin and not very pliable.  It wanted to stick to the parchment.  I used a very thin spatula to lift the edges to fold into the center per instruction.  As you can see, it does not look like soft pliable dough.

OLYMPUS DIGITAL CAMERA

Folded corners – kind of.

The author states this in the comments section in response to the stringy, sticky texture:

This has happened to me before a couple of times the first of which is when using pre shredded cheese that is 1 carb per 28 gram (1/4 cup) serving. It should be <1 g carb per serving on the label. What happens I think is there are extra starches added to the cheese to keep it from clumping which accounts for the extra carbs there and it messes with the recipe. The other possibility is that it just wasn’t hot enough and needed to be reheated. If it was sticky and straggly though I’m guessing it was the cheese. The other thing I find that makes it much easier to melt is using a shredded cheese that is a regular shred. Finely shredded cheese doesn’t work out well. The only other thing I can think if is measurements and so I’ll add that I use a regular tablespoon measuring spoon to measure out the flours and always a level scoop. 

I should have read those comments first. 😉

I prepared the cream cheese filling and placed a small cookie scoop amount of filling in the center of each square.  (I had some filling left over).  I flattened it slightly and baked it for about 13 minutes. For the filling I used a Stevia/Maltodextrin blend from Central Market (Local grocery) Here is a similar one on Amazon

Low carb danish with filling

I checked it a 10 minutes as the author suggested as it can burn easily.  Mine did get a little brown on the bottom but I liked the crispness in contrast with the soft cream cheese filling.

Here is the results before frosting.

Finished product before frosting.

Finished product before frosting.

I made the frosting and piped it on the Danish pastries.  (I used a powdered Swerve sweetener for the frosting) I used my husband and son as my non low carb eating taste testers.   It passed the test and I had a request for more  in the future.  I will buy the exact ingredients and give it another go the next time we have a sweet tooth. 🙂

OLYMPUS DIGITAL CAMERA

Ta Da

Melyna

Albert Phineas Drache


Living low carb – low carb pizza

When I am eating low carb, one of the foods I tend to say goodbye to is pizza.  I tried making a pizza with a cauliflower crust, but it didn’t taste like I wanted it to and the texture was wrong.  Then one day on Pinterest I found a recipe for low-carb Everything Bagel Dogs at The Primitive Palate and they mentioned that the crust was basically like Fat Head Pizza dough. Huh?  So back to Pinterest I went.

I found a recipe at Ditch the Carbs called  Fat Head Pizza – The Holy Grail

This was what I was looking for.  The crust is very easy to make.  The directions say to mix gently but I found that it took a bit more mixing to get the melted cheese mixed in evenly with the other ingredients.  I did knead it by hand lightly (wet hands very slightly with water to keep it from sticking.)  Once mixed, transfer to parchment paper, top with another sheet and roll into your desired shape.  Peel off top sheet and it is ready to bake. I baked mine on a perforated pizza pan.

My dough made a very thin 12 inch pizza crust.   The recipe says to bake it 12-15 minutes.  Mine needed a little longer.  The recipe has a tip for making it crispier by flipping it after the top is golden brown.  Check it to make sure it doesn’t burn though. I did this and the crust was nice and crispy.  Unfortunately, I did not take photos of it after it came out of the oven.


Nutrition Information from Ditch the Carbs website for the crust only (They indicate it serves six)  Serving size: 1 slice (base only) Calories: 203 Fat: 16.8g Carbohydrates: 4g Sugar: 1g Fibre: 1.6g Protein: 11g  (for full recipe and instructions click link in red above)

I chose veggies I has on hand for the toppings.

While the crust was baking I cooked the vegetables I planned on using for toppings.  The original recipe states any meat needs to be pre-cooked because once you have the toppings and cheese, it only needs five minutes in the oven to melt the cheese and warm the toppings.

I will caramelize the onions next time and maybe only slightly sautee the peppers.  The vegetable need to be fairly dry since it is a thin crust and the cooking time is limited.

After the crust had baked, I used 1/2 cup lower carb pasta sauce on the crust, then applied the cooked vegetable, then some pepperoni slices, sliced pickled jalapenos and black olives.

Added some shredded Italian blend cheese and it is ready to bake.

I baked my pizza for longer than the recipes five minutes.  I kept checking the pizza every few minutes until the toppings were melted.

It was hard waiting for it to cool enough to slice. 🙂

It was amazingly good and is definitely a recipe I will make again.


Enjoy and let me know if you try it.

Melyna

Albert Phineas Drache


Back on track. Low carb living redux.

Last year I started working on my health after I had some issues that made me reevaluate my lifestyle choices.  I was faced with possible surgery on my foot and told I was prediabetic.  I went to see a chiropractor and had a nutritional consult.   I blogged about it in four parts.  Here is part one: Taking a Different Approach Part One

I lost 14.8 pounds during the cleanse, avoided surgery and decided to go low carb after the cleanse.  I lost 7.5 more pounds, then the holidays hit and birthdays and I gained five pounds.  I admit that I am a carbohydrate addict.  Once I eat sweets or breads, it is all downhill and the cravings start.

Now that the holidays and majority of birthdays are out of the way, I have decided to get back on track.  I still have 14 pounds to lose to reach my goal.   It was time to get serious and creative in my menu planning and bring the family on board with food that they also enjoy.

Pinterest has been a huge help in finding low carb recipes.  I have been able to satisfy my sweet tooth and find new recipes that both my family and I enjoy.   I have started a low carb board simply titles as Low Carb .  I have not tried all of the recipes that I have pinned, but I have tried quite a few.  In an attempt to help me stay focused, I plan on posting some of the recipes that I have tried and enjoyed.

This morning I decided to make a breakfast frittata with ingredients I had in the fridge.   (No recipe – just threw it together) It included, ham, spinach, Swiss cheese, eggs and cream with some seasoning.  It was low carb and filling.  A great way to start the day.

I found a recipe on Simply Recipes for a spinach frittata that sounds good and would be fairly low carb here: Spinach Frittata 

Breakfast Fritatta

Next time – Low carb pizza (yes – there is such a thing and no – there is no cauliflower involved)

Albert Phineas Drache


Melyna

Looking for low carb treats: Cinnamon Cream Cheese Squares.

I recently ran a series of posts about my health and what I did to address my concerns.

Since then I have been eating  low carb.  I have not added grains back into my diet. This keeps breads, pasta and rice off the menu.  I adore pasta but I have found Zucchini noodles cover this craving just fine.  I also found a  “bread” recipe that allows me to have a sandwich or hamburger with the family.  I am still tweaking the recipe.  I will let you know when Iget it the way I want.

One thing I had not re-introduced was sweets of any kind.  I searched the web and came across a site called Fluffy Chix Cook.

Cream Cheese

Cinnamon Cream Cheese Squares

http://fluffychixcook.blogspot.com/2014/05/cinnamon-cream-cheese-squares-low-carb.html

From the Fluffy Chix blog:

Cinnamon Cream Cheese Squares

by Leeann Mullen Teagno

Cut the Wheat, Ditch the Sugar

Ingredients

Crust

  • 2 C almond flour
  • 2 T coconut flour
  • 3 T sweetener (I used Swerve)
  • 6 T butter, slightly softened
  • 6 egg whites, whipped until stiff (about 5 minutes)
  • 1/4 tsp. salt
  • 1 tsp. baking powder
  • 1 tsp. xanthan gum

Filling

  • 12 oz. cream cheese (1 ½ bricks), at room temperature
  • 3/4 C sweetener (I used Swerve)
  • 2 tsp. vanilla extract

Topping

  • 1 tsp. ground cinnamon and 1/3 C sweetener (I used Swerve), mixed together
  • 3 T melted butter


Directions

  1. Preheat oven to 375 degrees and grease an 8×8 or 9×9 square cake pan.
  2. In a large bowl, whisk together crust ingredients almond flour, coconut flour, sweetener, salt, baking powder and xanthan gum until evenly mixed.
  3. Cut in butter by adding it in small chunks and using a pastry cutter to make a fine, crumbly meal out of it. There will be small chunks of butter remaining, but no large chunks should be visible.
  4. Fold in egg whites by hand. You will lose much of the volume from the egg whites, but fold slowly and carefully. The resulting batter should be evenly mixed and somewhat fluffy in texture.
  5. Place half the crust dough into the center of the greased baking dish and use a spatula to carefully and evenly distribute it throughout the bottom of the dish.
  6. Par-bake the bottom crust for 10 minutes or until it begins to slightly firm up. While you wait, prepare your filling.
  7. To prepare the filling, combine room temperature cream cheese with sweetener and vanilla extract. Stir or whisk well until it is all combined and smooth.
  8. Remove the par-baked crust from the oven and allow to cool for about five minutes.
  9. Spread the cream cheese mixture evenly over the top of the par-baked crust.
  10. Carefully spread the remaining crust mixture over the top of the cream cheese layer. To avoid mixing the cream cheese in with the top crust layer, I recommend applying the top crust in small dollops all over and then smoothing them together as opposed to doing one large dollop in the middle of the dish. This will prevent the cheese from mixing into the top crust.
  11. Smooth the top crust and sprinkle it evenly with all of the cinnamon and sweetener mixture.
  12. Carefully pour the melted butter over the top, taking care to drizzle it all over so that it doesn’t all settle in one place.
  13. Bake the dish on the middle rack for 30-40 minutes or until the top is deep golden brown and caramelized and firm to the touch.
  14. Allow to cool for at least 20 minutes before slicing, or let sit over night. The squares are delicious warm or at room temperature.
  15. Slice into 12 squares and enjoy.

Nutritional Information

Squares contain 3g net carbs per serving (1/12th of recipe).


Taking A Different Approach Part Four

I am sharing a small personal journey that I just completed.   My journey addresses an aspect of my life that I needed to work on as it was affecting my health.  I am not endorsing any products or methods for dealing with the subject of these blog posts.  I am sharing my thoughts and feeling and what I decided was the best course of action for me.

Part Four

The Cleanse

Day One
I made it and didn’t kill anyone. It’s a win! I tried a couple of the included recipes. For some reason the red cabbage salad sounded good but in reality, it was pretty awful. I think it could have been better but I am not trying it again. I had roasted root vegetables for dinner. Oh. My. Goodness. That was a winner. It seemed a bit carb heavy to me but after the cabbage salad – who cares. The best part was the little golden yellow beets. Roasted. They were so good. I made enough to have leftovers the next day.
Day Two
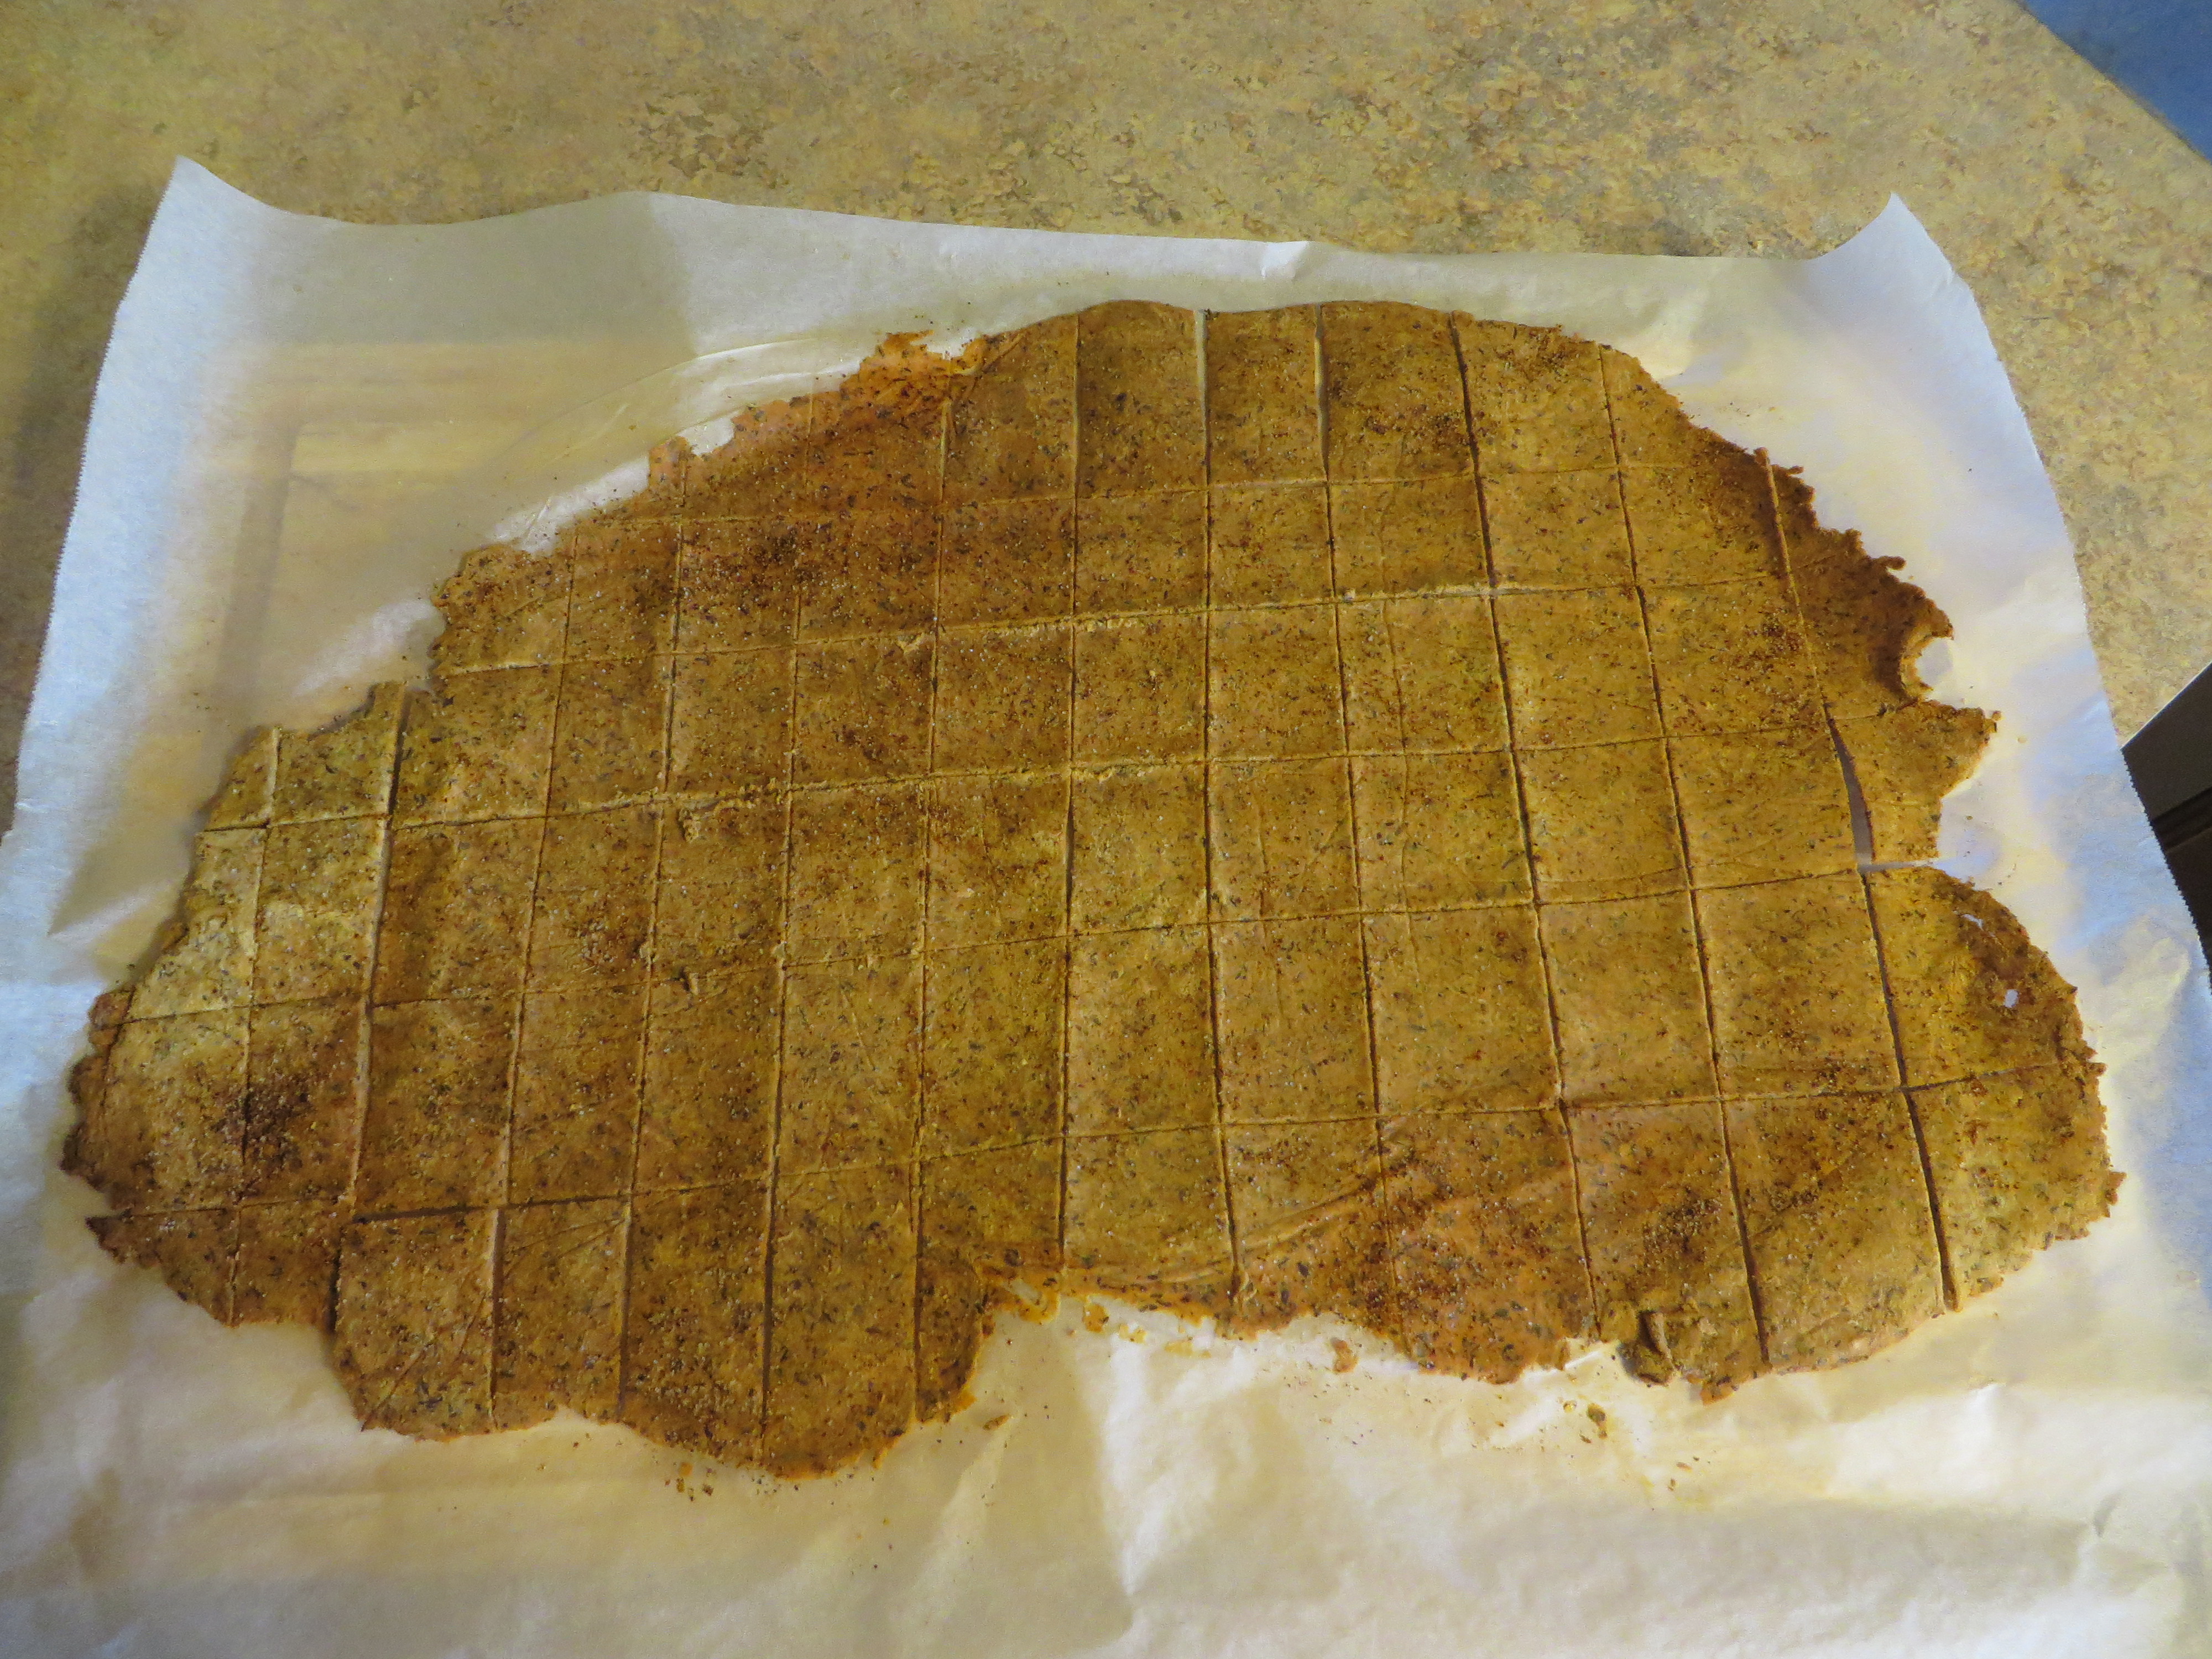
Not as fun today. Headache, tired. Didn’t feel like cooking just made the shakes and juiced some veggies and fruits. I did make kale chips. I think this was the day that the lack of caffeine hit me. I notice I am really tired. I am still trying to get the shake to be appealing and not make too much. I am using coconut milk as there is no dairy.
Day Three
I spent the day running errands, and then when I got home I slept four hours. Wow. This is not the norm for me. I found that eating out vegan with the added caveat of no grains, which includes rice, is not easy (at least where I was today). I really miss eggs and cheese. The headache is gone at least.
Day Four and Five
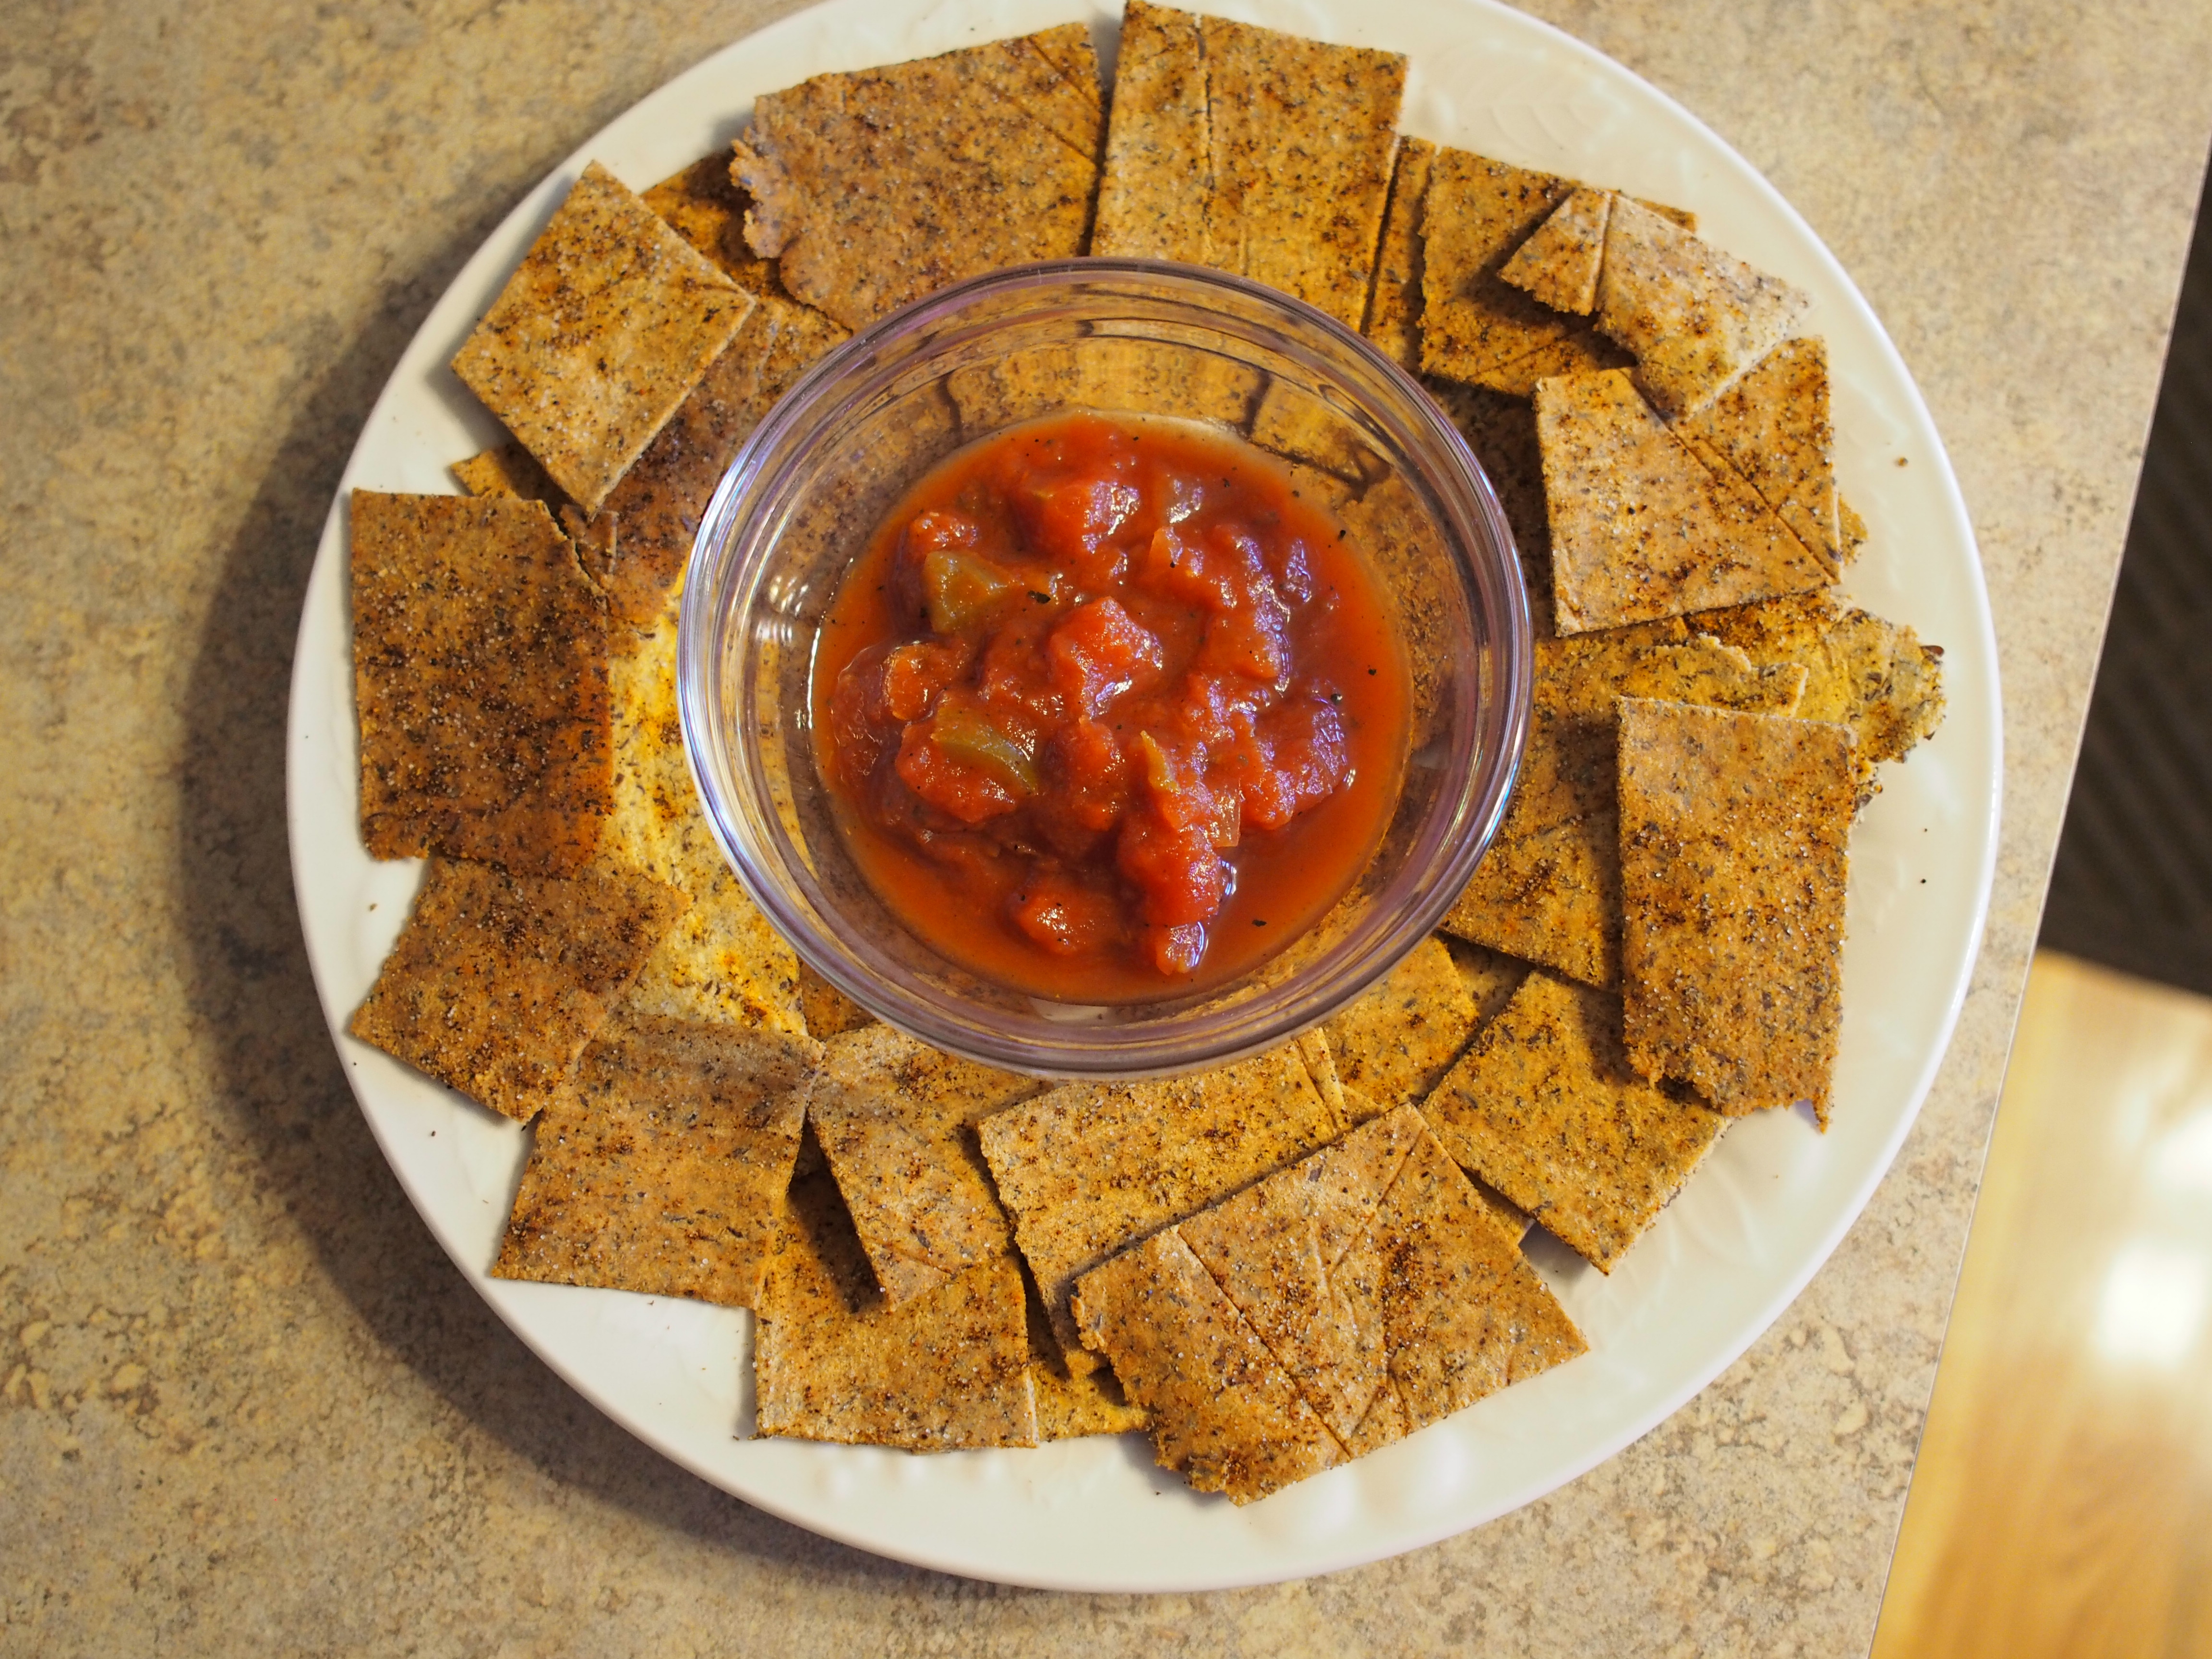
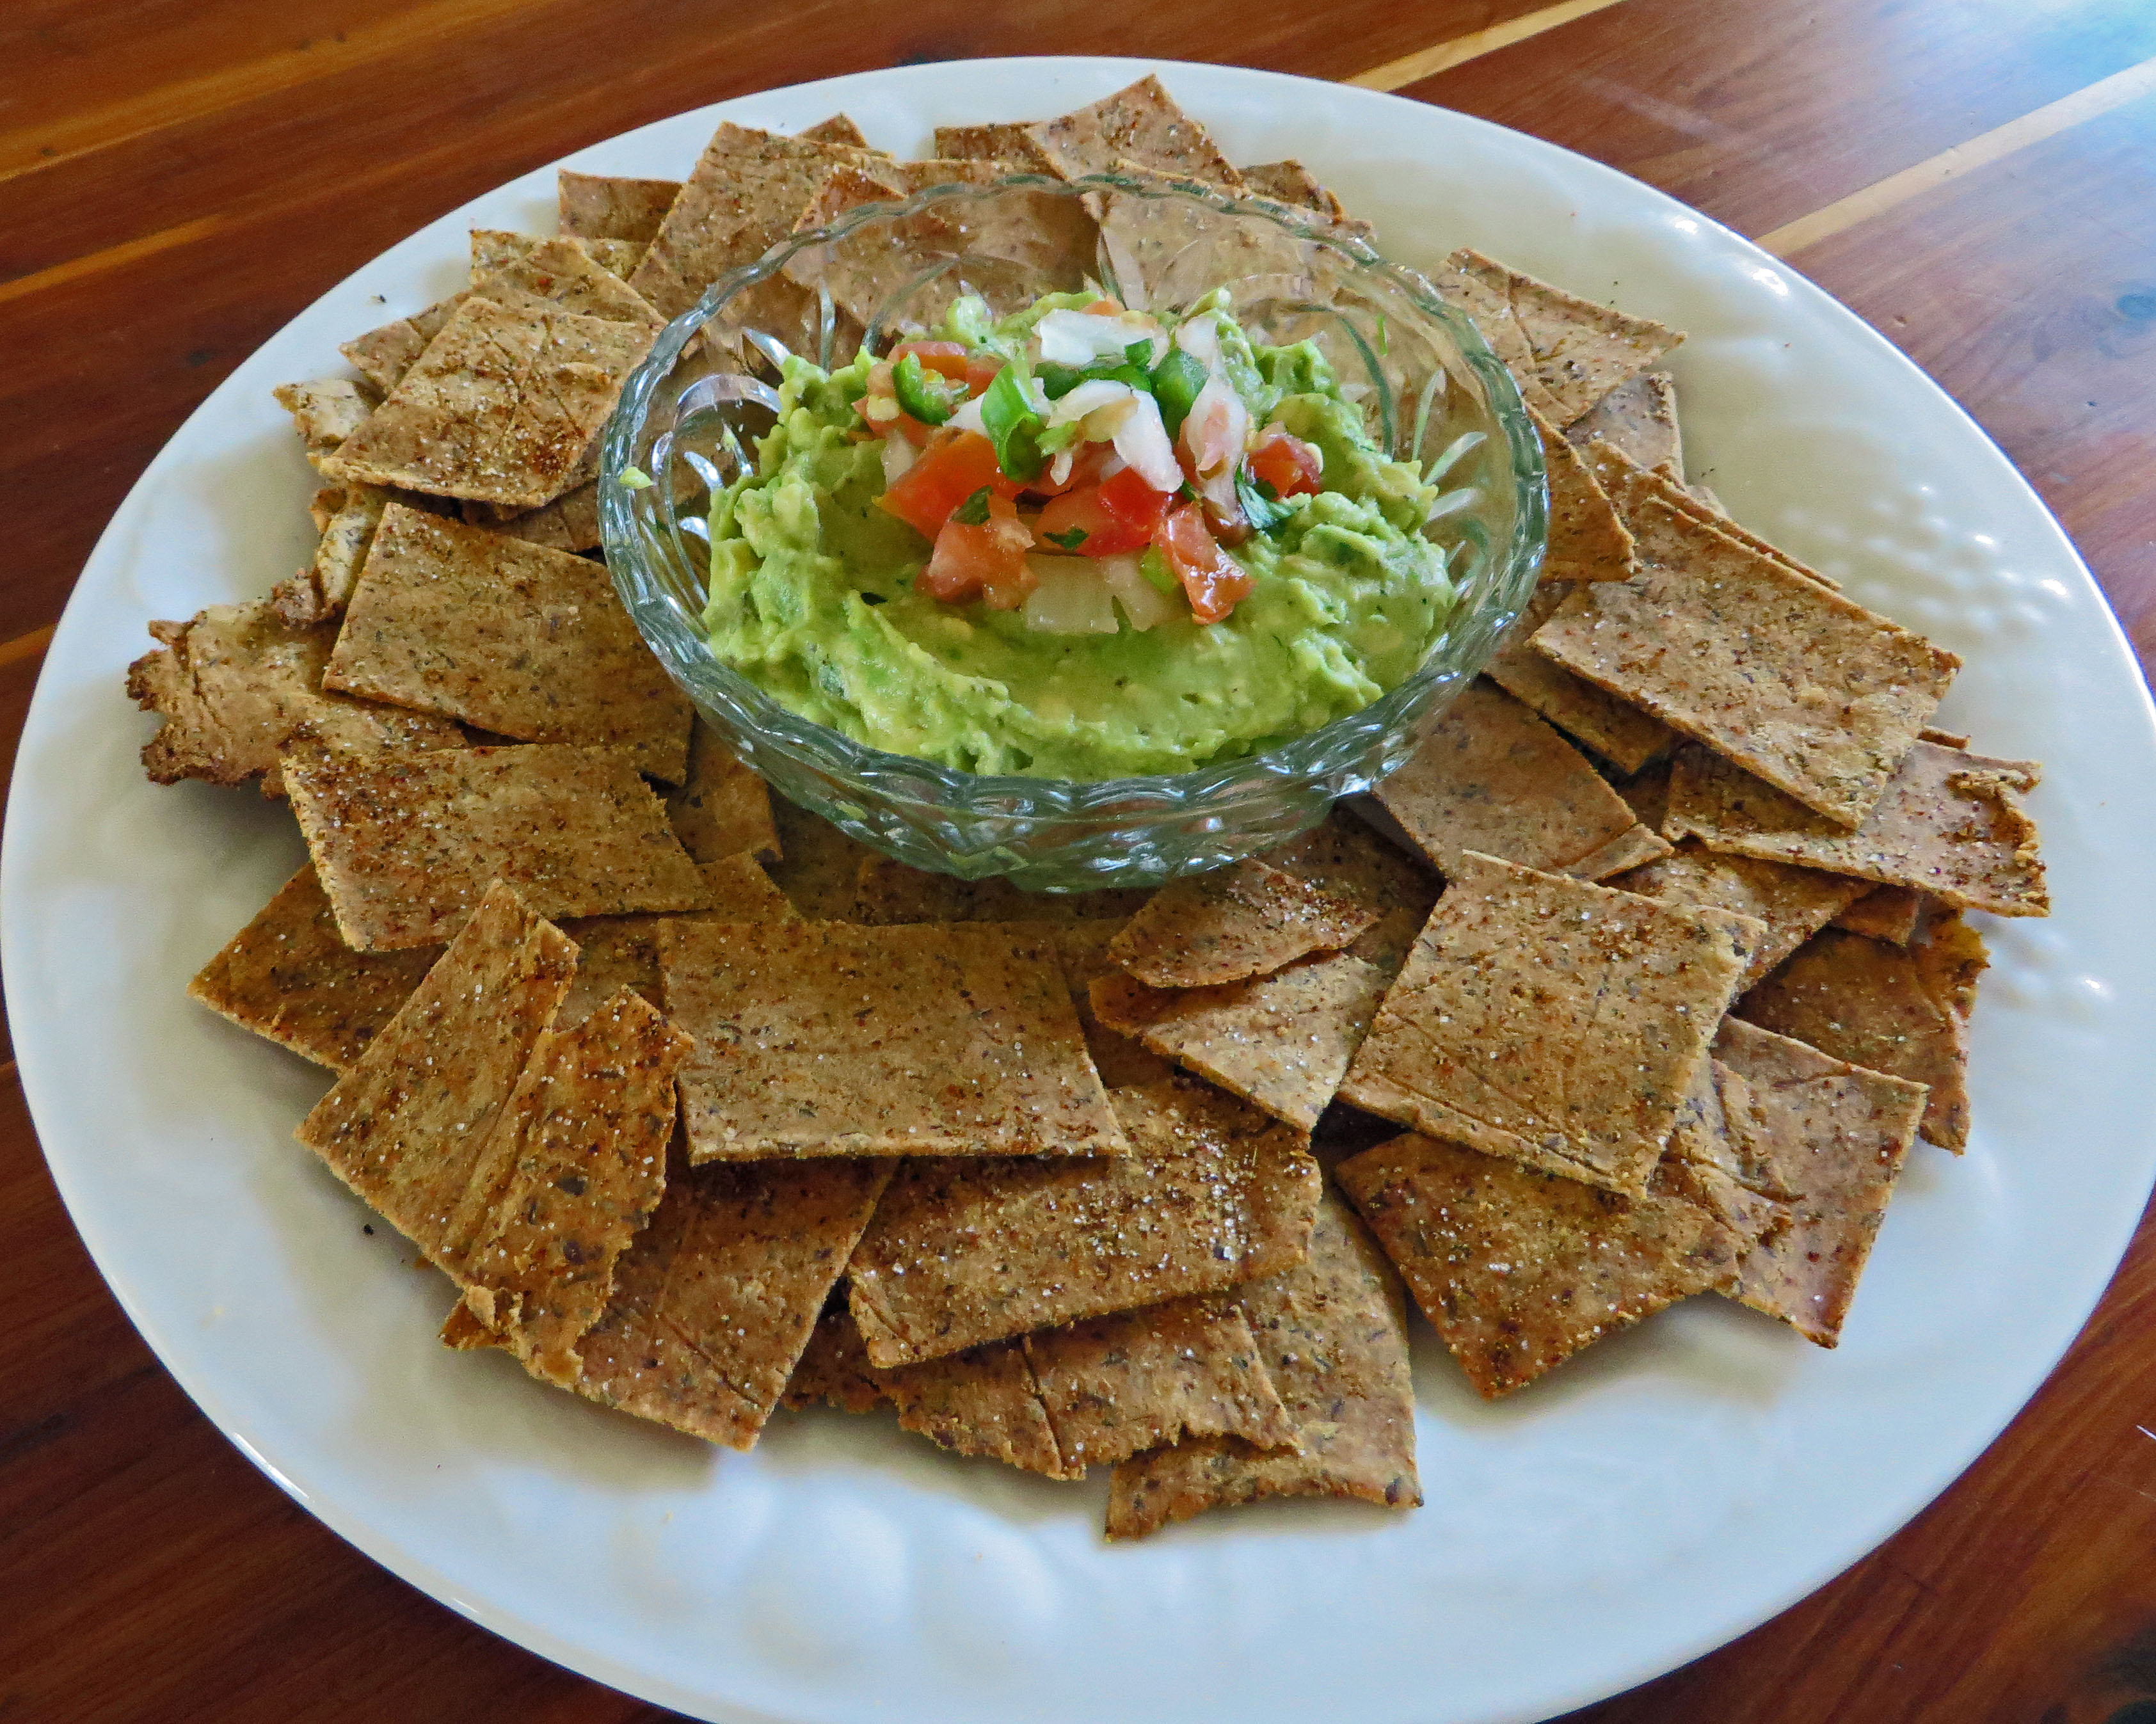
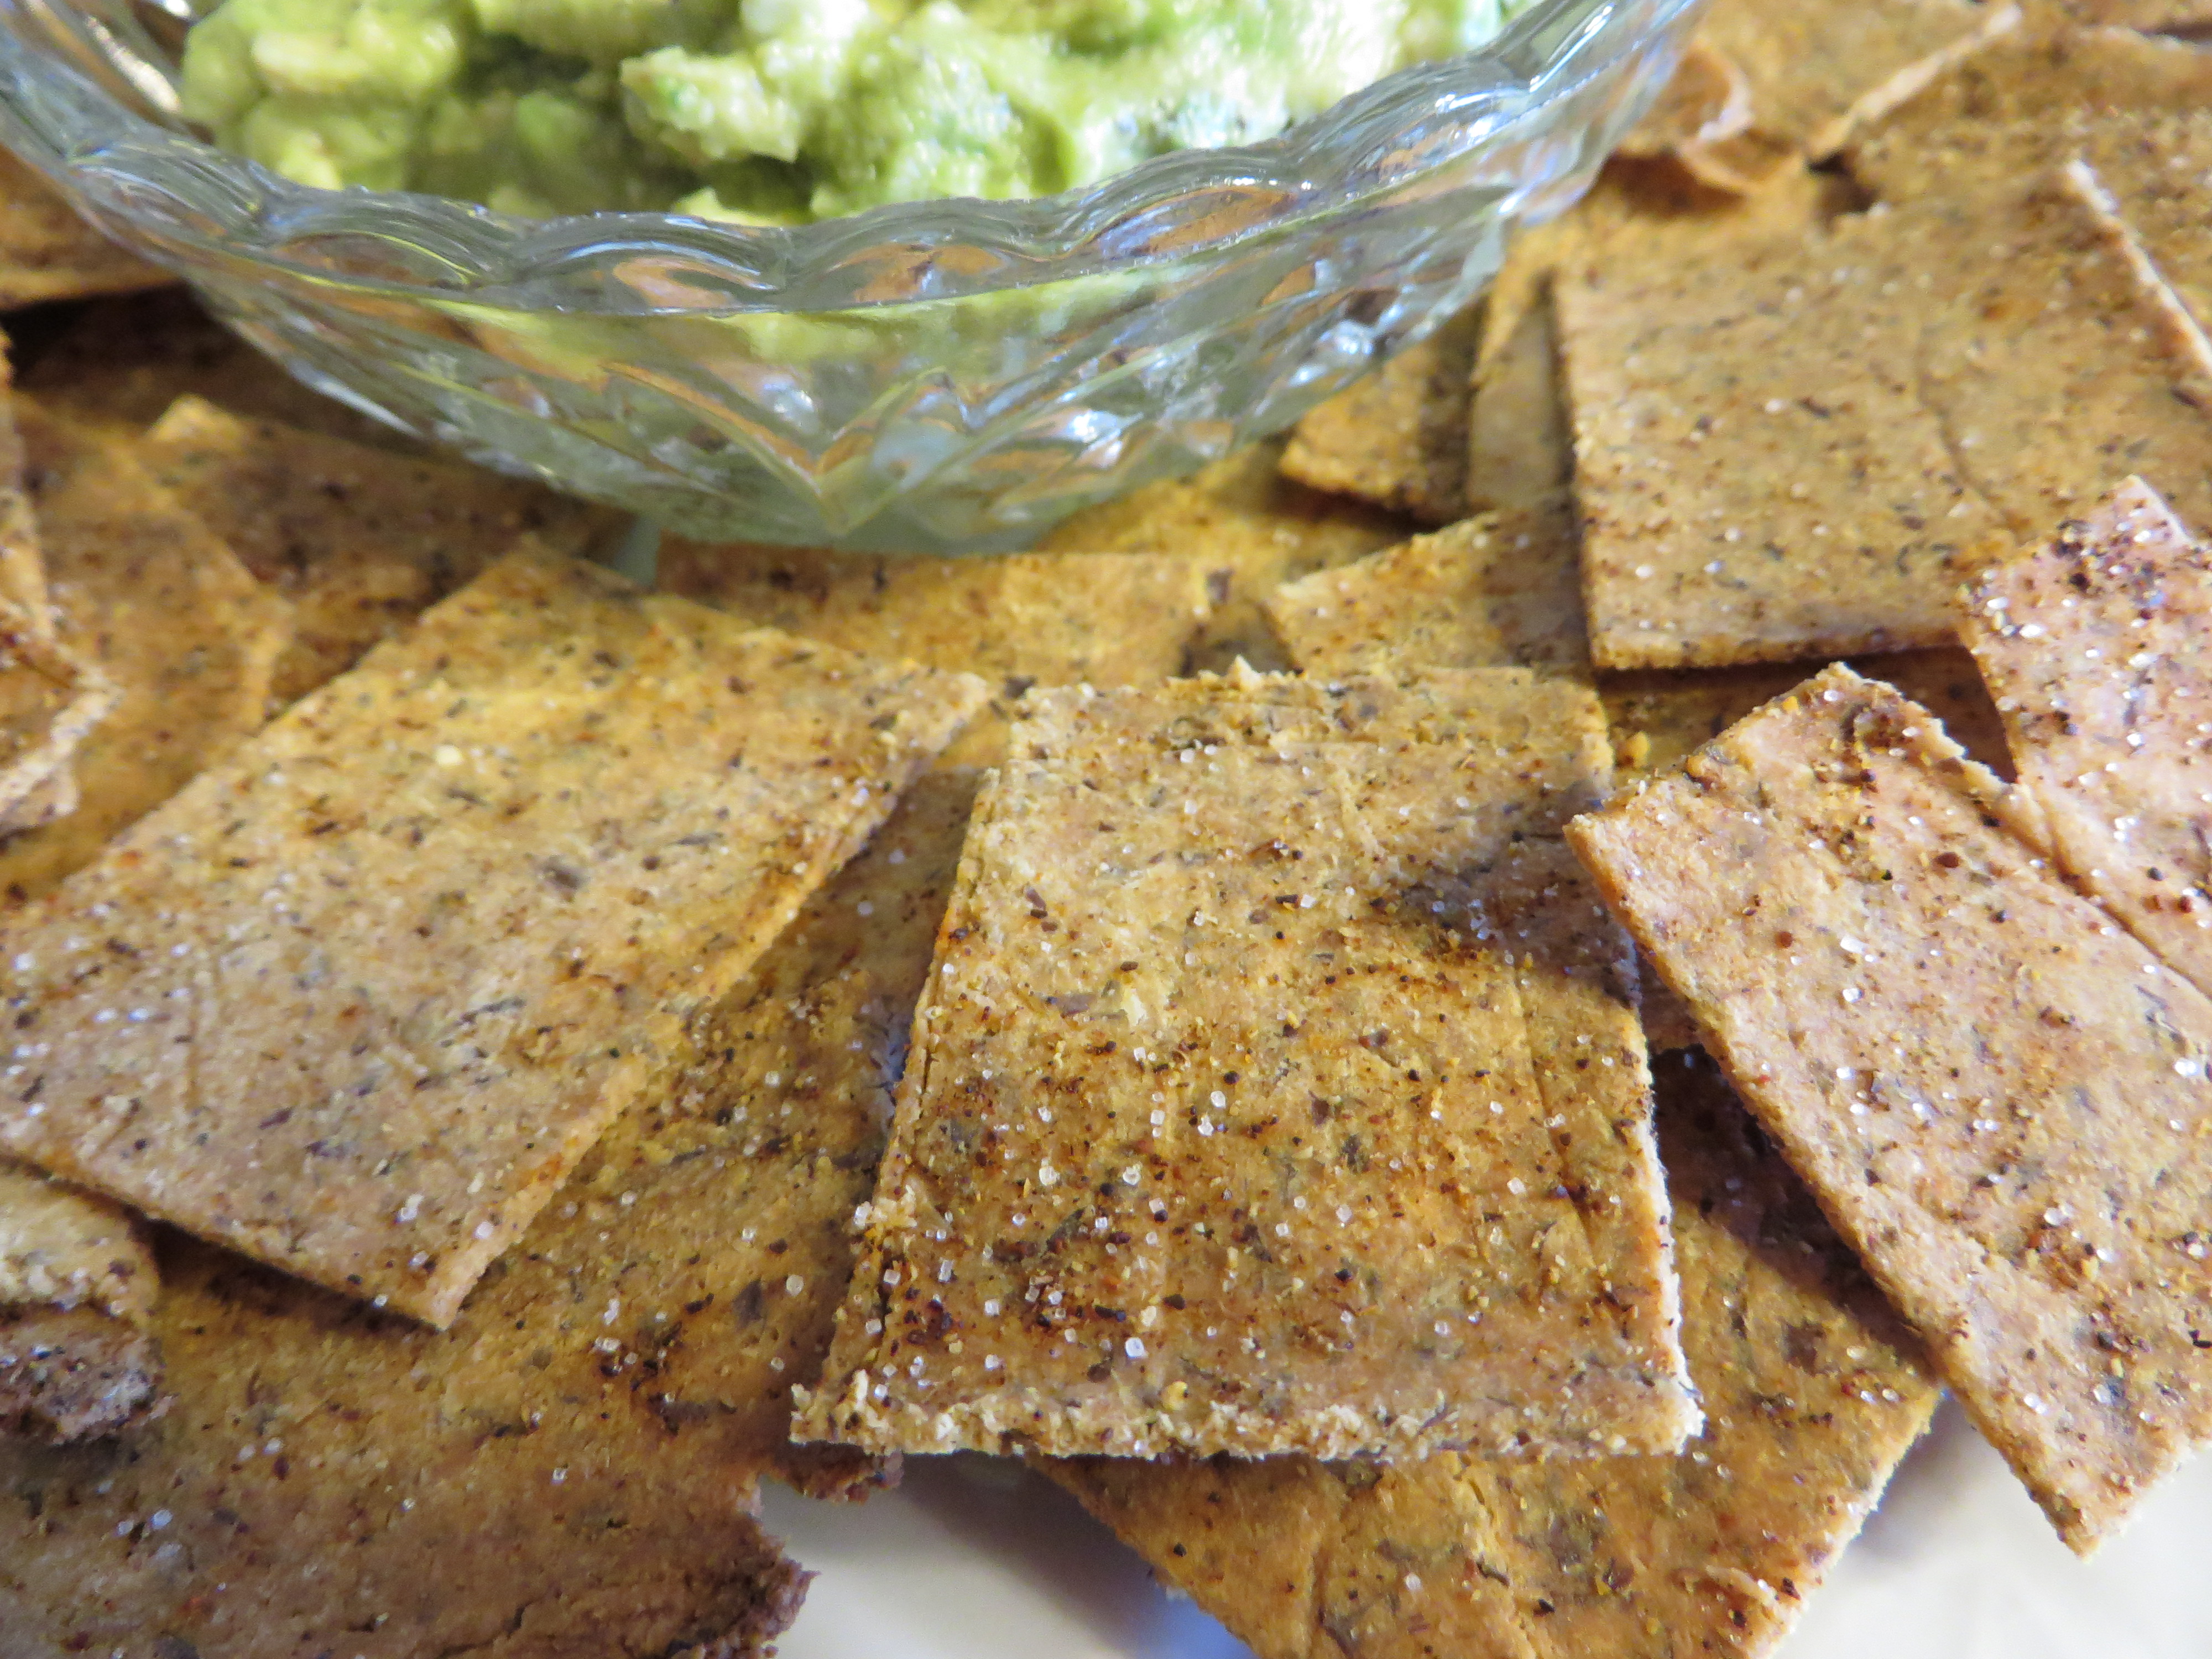
I think I am figuring out how to make this work for me. I am not very good with the no cheese part but I am managing and have yet to stray from the plan. Funny what one misses when one can’t have it and which ones take top ranking in that list. I have lost seven pounds so far and can see a bit of a change, though not much. Guacamole is not the same without chips and the zucchini chips are lacking without the cheese but it was better than nothing.
It is at this point that I am telling myself this is good but I will never do this again. 😉
Days Six through Ten
I am learning how to make this work for me. I have found that I really do not like vegetables. Well I do but I like them better when someone else cooks them. Zucchini and avocados are my go to foods. I like the shakes in the morning.
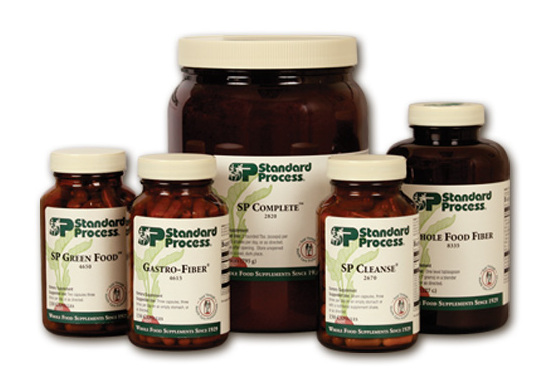
In this purification cleanse, there are two fiber options – one in capsule form and one as a powder to be mixed in the shake. I was given the powder. When I added it to the shake it made it thicken up to sludge pretty fast. It was gross. So I started making the shake with the SP Complete powder and drinking the fiber mixed in water separately. It worked SO much better. I have found now that I am able to create food that meets the criteria. I do not want a second shake during the day but I am still taking the supplements as directed and the fiber three times a day.
I am finding I have more energy than in the early days and I am incorporating other veggies into my meals but not many.
This was the note I made about how it was going and it is pretty much what I stated above. This was the day it kind of came together for me:
I am on Day Ten of the cleanse. I have lost ten pounds and I am sort of getting used to this. One thing I am finding is that food for me is not just for sustenance. In my family food relates to celebration, birthdays, special occasions, a way of showing people you love them or as a comfort when angry, sad or depressed. It is one of those things that can be justified to buy because we all have to eat, right? I am hoping that this cleanse will help reset some of that food dependency and I will incorporate other ways to deal with emotional eating and keep the treats to happy, special occasions, plus make better choices when I get back to a regular diet.
Day Eleven:
Good day. My husband’s birthday is tomorrow and I will be cooking a large seafood meal for him and there will be cheese cake. So far I have been able to stick with my regimen and cook for the family too. I am determined. I am doing a ton of internet searches for vegan recipes and having to weed out recipes that have grains or nuts.
*At this point I am telling myself that this is not so bad and I might do it again, lol*
Day Twelve
Wow. I spent the day cooking. I made Creamy Pesto Shrimp for the family as well as breaded shrimp and fish Veracruz. I grow a lot of basil, so I decided to try something new for me. I made the traditional pesto for the family. For me, I modified the recipe and used hemp seeds (which I very lighted toasted) and coconut milk. Instead of cheese, I added nutritional yeast. I was pleasantly surprised. One of the guests said they liked it better. The nutritional yeast gives it a slightly nutty flavor but also a bit like cheese. Since I could not have shell fish, I just had the sauce over spaghetti squash. I was able to eat the fish Veracruz but sadly it did not turn out as well as expected. I am allowed quinoa so I may try it over that tomorrow. The cheesecake was the only temptation but I held strong. 
I had some friends ask for the recipe. It was a combination of several I found as I was looking for vegan pesto. Here is what I ended up doing:
Vegan Pesto
3 cups fresh basil
1/4 cup hemp seed – lightly toasted (I can’t have nuts now or I would have used pine nuts)
2 tablespoons fresh lemon juice
1/4 cup extra virgin olive oil
1/2 teaspoon sea salt
I then added three tablespoons of nutritional yeast. This gave it a cheese like flavor, helped thicken it and gave it a slightly nutty taste. (I am sure you can add more or less to taste. This was the first time I used it)
Add all ingredients to food processor or blender except for olive oil. Process while slowly adding olive oil.

For the creamy part
I melted a half cup of butter and added a can of coconut milk – full fat because you need the richness. After mixing the butter and coconut milk, add 1/3 cup of the pesto and stir until blended. Cook until thickened. Can add more nutritional yeast if desired.

Creamy vegan basil pesto with mushrooms and peppers over zucchini noodles with Black Krim tomatoes from the garden.

I ate some right away and then I refrigerated the rest. It thickened after cooling and reheats well. I was not all that impressed with the spaghetti squash texture that night so I made zucchini noodles the next day. The zucchini noodles are made with this tool called the Veggetti. It has two different thicknesses it can cut.  A friend also recommended this Spiralizer on Amazon.
He really likes it. I chose a smaller one because I wanted one that takes up less space. I may look into the larger one later.
Day Thirteen
Good day. I have now lost 12.4 pounds. I have not added any exercising while on the cleanse, just the stretches and the usual walking up and down stairs all day. I sautéed some sweet peppers and added zucchini noodles then stirred in some of the left over creamy pesto sauce. It was fabulous. For another meal , I had the fish Veracruz over quinoa. It was much better today than yesterday.
Day Fourteen:
Feeling pretty good today. I am having leftovers from the pesto.
Day Fifteen: Woke feeling good. No weight loss in the last few days. I ended up going out to lunch with my daughter and did not find anything that really fit the cleanse perfectly. Since I can have meat on this part of the cleanse, I chose an Italian soup that had sausage and vegetables. It tasted good (not great) and I felt guilty about eating it because of the sausage. Back on track tonight.
Day Sixteen – Decided to try adding the shake mix to my veggie juice. Not my best idea. Yuck. So far I like the fruit shake I have been making.
1 cup coconut milk or Flaxseed milk
Small handful of frozen strawberries or frozen mango chunks (maybe half cup)
1/3 of medium banana
2 scoops shake mix
Tablespoon Flaxseed oil (omitted if I use Flaxseed milk)
Water to thin if it is too thick.
Stevia if it needs a bit of sweetener
Day Seventeen – We went out to eat with my husband’s family for his birthday. Of course, this was a place that I would have ordered chicken fried steak and had pie for dessert before this cleanse. As it was, I was able to stick to the diet with a small grilled steak and green veggies for the side. I cannot have eggs or cheese and most of the salads came with it. I did not want to have to pick things out, so no salad. If I were just low-carbing it – I would have had an omelet.
Day Eighteen – Today I tried a new recipe, Coconut Red Lentils with Spinach, Cashews & Lime. I found it on Food.com. I could not add the cashews because of the nut restriction but it still came out very tasty.

Coconut Red Lentil with Spinach, Cashews and Lime

So far I have lost 14.6 pounds and I am able to get into some old Capri pants I have not worn in a while. Twenty five more pounds to my goal.
Day Nineteen – Good day. I promised my mother I would make a chocolate trifle when my cousin came to visit. I managed to complete the task without any tastes. I call that a win. I have added some meat back into my meals. Tonight I had a small steak with green vegetables. It was wonderful.
Day Twenty – So ready to be finished with the cleanse. My mother gave me a small clay cooker. I had a large one at one time and it got broken, but I had not replaced it. I also have a cook book called Cooking in Clay by Joanna White. I decided to make the Italian Roast pork from the cookbook for the family. It stayed within the guidelines of the cleanse at this point and it came out very tender and oh so tasty.
I am feeling pretty good but I find that I am having trouble sleeping. This is a recurring problem and one I will need to address soon.

Day Twenty-one – Last Day! Finished up the supplements and checked the inventory on the fiber and shake supplement. I have an entire container of shake mix left and a partial bottle of the fiber supplement.

Conclusion:
I lost 14.8 pounds total and was able to fit back into some jeans that I had outgrown last winter.
My goal is to return to a low carb or paleo diet, incorporate more vegetables in to my meals and lose 20 more pounds.
I started my first non fast day with an omelet with peppers and mushrooms. Day two was another omelet with mushrooms, spinach and nutritional yeast. This was tasty.
Overall, this cleanse was not that bad. I was pretty grumpy the first few days and part of it was the lack of caffeine and me not knowing how to eat vegan. Once I researched some recipes and got over the caffeine withdrawals, I was fine. The more weight I lost, the better I felt and the more energy I had. At first I swore I would never do this again, but I think I would consider it an annual event, one I would most likely schedule after the holidays when giving in to temptation will probably have its greatest occurrence.
I am also incorporating walking into my daily activities. I started with a little over a mile and upped it to two miles the next day. I plan on keeping it around two miles a day for now.
Losing the weight has helped me to move my focus away from food for comfort. The carb cravings are also gone. The depression has decreased somewhat. I feel better about taking control over a part of my life. It is a start. I still need to work on other ways of dealing with stressful situations. Being able to take something that was so ingrained in my way of dealing with emotions and being able to change it is empowering. I am still working on my sleep issues and I am sure I will figure that one out too.

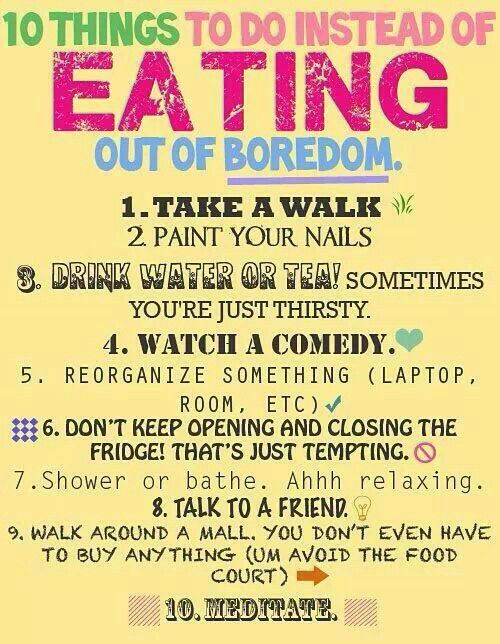
I want to share a sign that I found.  I will keep it handy as a reminder of some alternative ways to deal with emotional eating:


Melyna


Taking A Different Approach, Part Three

I am sharing a small personal journey that I just completed.   My journey addresses an aspect of my life that I needed to work on as it was affecting my health.  I am not endorsing any products or methods for dealing with the subject of these blog posts.  I am sharing my thoughts and feeling and what I decided was the best course of action for me.

Part Three

Weight gain and depression. What should I do?

I expressed to the chiropractor that these were also concerns. This chiropractor has a holistic approach. After chatting, he recommended I speak with his wife who is also a chiropractor and does nutritional counseling. We started on some supplements and she suggested that I try a cleanse. This is through a company called Standard Process. It is their 21 Day Purification Program. From their website:
“The purification program combines a generous menu of whole foods with supplements that support the body’s ability to remove naturally occurring toxins. This promotes a state that allows for toxin release.”
“The Standard Process Purification Program is not strictly a cleanse diet but rather a structured program that combines whole food eating with supplements, nutritious supplement shakes, and light exercise. The menu includes an abundance of fresh vegetables and fruits for the first 10 days with select proteins added on day 11.”

Okay. Let’s refresh. Food is my go to for comfort. I am also a die-hard coffee addict. I even have a page devoted to coffee on the blog. Give up coffee? You have got to be kidding! Did I mention that I love meat and cheese and eggs? Well those were off-limits too. Oh and no grains of any kind, no nuts and I would have to eat vegetables. Get out of here! (Okay – I like vegetables, but not as my total meal) As you may have guessed, I am not a vegetarian and this purification program was going to have me eating as a vegan minus the grains. No way. vegetables-fresh-100715-02
Never say never. When my husband voiced that he did not think I could do it, well, he must have caught me in my rebellious teen mood because I was all “I’ll show him” and I agreed to the cleanse. What did I just get myself into?!
spcleansingkit

The day I bought the purification kit, I was presented with a large bag filled with shake supplements, Cleanse supplements, Green Food supplements and Whole food fiber powder. I was ready. I did the preliminary shopping and read through the instruction in the booklet as well as the online site. They also have an app for the iPhone. The online PDF can be downloaded and it is a great resource for recipes, tips and what to expect when the cleanse is complete
This was my schedule:
Days 1-7
ƒ
2-3 SP Complete per day
(2 scoops per shake)
7 SP Cleanse capsules 3 times per day
1 tablespoon Whole Food Fiber per SP Complete shake

Days 8-21

2-3 SP Complete or SP Complete Dairy Free shakes per day
(2 scoops per shake)
1 tablespoon Whole Food Fiber per SP Complete shake
5 SP Green Food capsules 2 times per day

Plus I was on three other supplements that I had been taking to deal with the adrenals, blood glucose levels,and a B-vitamin complex. So I was taking a lot of supplements. This was out of the norm for a person who balks at medications. I decided to think of it as a pumped up vitamin regimen.

Next time: Part Four – The Cleanse

Melyna